1. Introduction: The Chocolate Cake Quest Begins!
Ah, chocolate cake. It’s the sweet symphony of cocoa and sugar that dances on the tongue and warms the heart. If you’re here, you’re likely on a noble quest to find the perfect chocolate cake recipe, and let me tell you, you’re in for a treat!
This isn’t just any chocolate cake. Oh no, this is the best chocolate cake recipe you’ll ever taste. Prepare for a culinary journey sprinkled with humor, tips, and a whole lot of chocolate love. You’ll want to bookmark this page, trust me.
What’s in a chocolate cake, you ask? Well, besides chocolate (obviously!), there’s a dash of magic, a sprinkle of joy, and a whole heaping scoop of deliciousness. Ready to dive in? Let’s go!
2. Ingredients: The Magical Components
Before we embark on this chocolatey adventure, let’s gather our forces. The ingredients you choose will set the tone for your masterpiece. So, gather round, and let’s talk about the key players.
The Usual Suspects: Flour, sugar, and baking powder are the trio you’ll find in many cake recipes. They are the backbone, the unsung heroes that hold it all together. But what makes our chocolate cake special is the quality of the cocoa powder—opt for the finest you can find.
The Game Changers: Enter vanilla extract, eggs, and buttermilk. These bring harmony and richness to your cake. They’re like the supporting actors in a blockbuster movie—essential and unforgettable.
The Secret Weapons: Now, this is where things get interesting. A pinch of salt (to enhance the sweetness), a splash of coffee (to deepen the chocolate flavor), and a dash of baking soda (to make it fluffy and light). These are your secret weapons in the war against mediocre cakes.
3. Preparation: Setting the Stage
Alright, you’ve got your ingredients. Now, it’s time to prepare for the magic. This step is crucial; it’s the calm before the storm, the time to double-check everything.
Preheat and Grease: First things first, preheat your oven to 350°F (175°C). Grease and flour your cake pans. Nobody likes a sticky situation—especially not when it comes to cake!
Mixing with Love: In a large bowl, whisk together your dry ingredients: flour, sugar, cocoa powder, baking powder, baking soda, and salt. In a separate bowl, mix the wet ingredients: eggs, buttermilk, coffee, oil, and vanilla extract. Slowly combine the two, stirring gently. Feel the texture transform as they come together in harmony.
The Batter Dance: Once mixed, your batter should be smooth and luscious. It should pour like a dream, almost making you want to dive right in. Resist the temptation, though—raw batter is not the destination.
4. Baking: The Sweet Anticipation
With your batter ready, it’s time to bake. This is where the magic happens, where the ingredients unite to become more than the sum of their parts. The anticipation builds as the kitchen fills with the smell of chocolate.
Into the Oven: Pour the batter evenly into your prepared cake pans. Slide them into your preheated oven and let them bake for about 30-35 minutes.
Patience, My Friend: While waiting, don’t peek too often. Let the cakes rise in peace. Use this time to clean up, dance around the kitchen, or simply enjoy the aroma wafting through your home.
The Toothpick Test: Check for doneness with a toothpick. If it comes out clean, your cake is ready. If not, give it a few more minutes. Remember, patience is a virtue!
5. Cooling: The Calm Before the Icing
Once baked, your cakes need a little rest. Cooling is crucial for a cake that’s easy to handle and ready for frosting.
Out of the Oven: Carefully remove the cakes from the oven, and let them sit in their pans for about 10 minutes. This allows them to settle and makes them easier to handle.
A Breath of Fresh Air: After 10 minutes, remove the cakes from their pans and place them on a wire rack. Let them cool completely. This is the perfect time to start preparing your frosting.
Zen and the Art of Cake Cooling: Use this time to center yourself. Take a deep breath, sip on some tea (or coffee, if you’re like me), and prepare for the sweet finale.
6. Frosting: The Icing on the Cake
We’re nearing the finish line, folks! The frosting is where you can let loose and get creative. It’s the crowning glory of your masterpiece.
Choose Your Weapon: Whether it’s classic buttercream, rich ganache, or a simple chocolate glaze, your frosting will take your cake to the next level.
Mix It Up: For a basic buttercream, whip together butter, cocoa powder, powdered sugar, vanilla extract, and a splash of milk. Beat until smooth and fluffy. Adjust the consistency with more milk or sugar as needed.
The Spread: Once your cakes are cool, it’s time to frost. Place one cake layer on a plate, spread a generous amount of frosting on top, then add the second layer. Frost the top and sides, smoothing it out with a spatula.
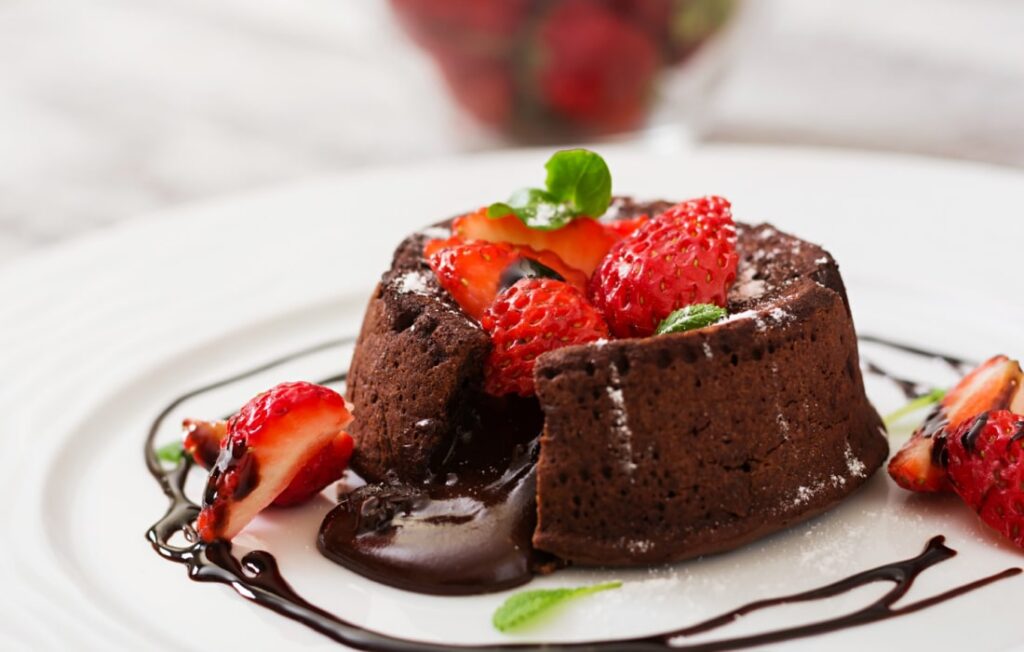
7. Decoration: The Final Flourish
The cake is frosted, but why stop there? Let’s add some flair and make it picture-perfect.
Sprinkles and More: From sprinkles to chocolate shavings, now’s the time to get creative. Add a touch of elegance with some edible flowers or keep it fun with colorful sprinkles.
Piping Perfection: If you’re feeling fancy, use a piping bag to add decorative edges or swirls. It’s the little details that make a big difference.
A Work of Art: Stand back and admire your creation. You’ve done it! A masterpiece worthy of any celebration—or just a Tuesday night treat.
8. Tasting: The Moment of Truth
The cake is ready, and the moment has finally arrived. It’s time to taste the fruits of your labor.
Slice of Heaven: Cut yourself a generous slice. Notice how it holds together perfectly yet melts in your mouth. The rich chocolate flavor, the perfect sweetness—it’s everything you dreamed of and more.
Share the Joy: Gather friends and family, or savor the moment in solitude. Either way, this cake is a celebration in itself.
The Verdict: Was it worth the effort? Absolutely. This is a cake recipe that will be passed down through generations, a classic that never goes out of style.
9. Chocolate Cake Variations: Spice It Up!
Feeling adventurous? Why not try some variations to keep things interesting?
Add a Twist: Incorporate flavors like orange zest, cinnamon, or even a dash of chili powder for a unique twist.
Layers of Fun: Experiment with filling options between layers—think raspberry jam, peanut butter, or even a layer of cookie dough.
Mini Marvels: Turn this recipe into cupcakes for a portable treat. Just adjust the baking time accordingly.
10. Conclusion: The Sweet Journey Ends
And there you have it—the best chocolate cake recipe you’ll ever taste. It’s not just a recipe; it’s an experience, a journey filled with laughter and delicious moments.
Reflections: As you wipe the chocolate from your lips, remember the joy of creating something from scratch. Each slice is a testament to your culinary prowess.
Share the Love: This cake is too good to keep to yourself. Share the recipe, share the joy, and let the world taste what you’ve created.
Until Next Time: Stay curious, keep exploring, and never stop baking. The world of flavors is vast and waiting for you to dive in.
So, what are you waiting for? Get baking, and may your days be filled with sweetness and laughter!


I’m so glad I came across this post! The information you’ve
shared are so timely and helpful – practical, informative, and super timely for anyone
who is focused on their health. I’ll be pointing my readers to my blog about nutrition because
this is the type of content they appreciate. Thanks for your great work!
thank you, share my blog please